Saturday, December 15, 2012

Prospects: Arduino DUE

Yes, it's finally out, and I definitely scrambled to be one of the lucky to get one from the Maker Shed.

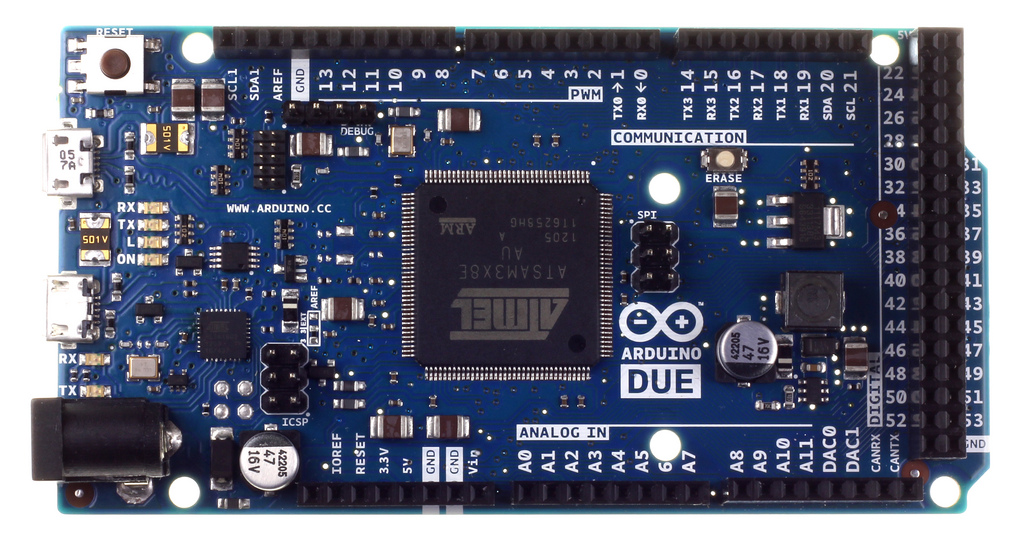
I've been waiting for this thing for over a year.  At the beginning it was just the prospect of more hardware ports (namely serial and I2C) that I was interested in, but as more specs and details were revealed, I was pleased and intrigue.  What follows in the specs that I'm most interested in and how they apply to the DPHP.


525% Faster

Specifically, the clock rate of the DUE is over 5 times that of a normal Arduino/Mega/Teensy/etc.  This doesn't include some of the operation efficiency increases because of the 32 bit processor.  I'll probably do some calc time comparisons once I get the code base going.  I can also comfortably use a single processor, where some of my previous designs with the Teensy had one processor for animation work, and another one for HUD and system management.

12x the RAM

While the minimum variable size has gone up, the DUE still has 3x the memory by comparison to a Mega or Teensy.  This means that I can make the trade for higher memory usage,  and get faster code operations.  Normally, the more numbers you can store, the less you have to manipulate the number 'in place' or with multiple operations, which takes more steps and longer overall.  More efficient code and faster processor means more time to do more things or more complicated tasks.

Two I2C ports

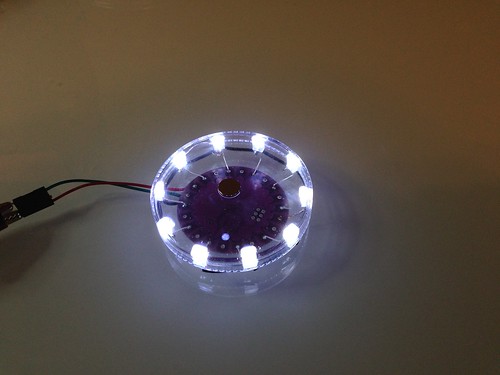
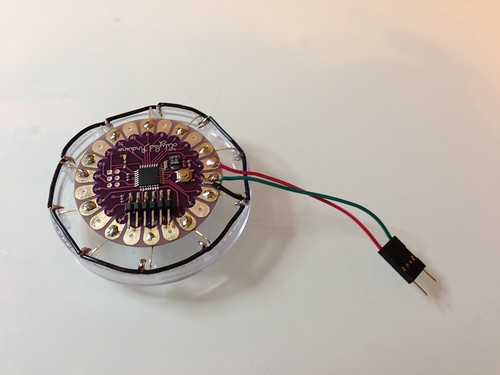
This is the big one that first got me all excited.  The DPHP uses Rainbowduinos to drive the main display, and these rely on the I2C protocol for sending display data to each of the Rainbows that make up the display.  Most large scale LED display use SPI because of the high data rate, however I2C for the rainbow and the 12 bit color it uses is quick enough.

The only problem has been that I2C is also a great protocol for connecting multiple Arduinos into a 'local network' for the various ancillary components that make up the suit for the helmet.  Specifically, the Arduino Wire library is one of the few one out there that enables 'slave mode' so that the 'main' controller can recieve 'pushed' updates from any of the other controllers on the network.  The alternative is a 'pulling' system that is normally used, whereby peripheral I2C devices are polled for updates or sensor samples.  This way, when there is an update to the system, like a button has been pushed or power system has a problem, it can 'push' relevant data to the main controller, rather than the main controller wasting time polling all the devices looking for updates.

So back to the problem.  One I2C port is really needed for full time 'display' duty, and likely will be at or near data saturation.  With a second port, where the other devices are more likely to send updates and thus the controller is primarily a receiver.  The second port the DUE helps keep that bus relatively open for the random point in time that update will arrive, where with everything on a single bus would mean more chance of collisions.

Four Serial Ports

Really, the Arduino DUE and Mega have more like 3+1 serial ports.  One of the ports is your serial port to the computer, and it's generally a good idea to leave the port open for debugging purposes.  You can use it, but I make it a habit on the more capable Mega/DUE/Teensy to not use the port for talking to anything but the computer.

Where I see the biggest advantage is in talking wireless devices.  I have grand plans for XBee radios talking to some wireless projects in the future.  I had planned to impliment the XBee with the Teensy++, but that chip only has one Serial port on it (the second port is a through the USB only for the terminal and programming, it cannot be used to talk to a device).  But that would be the only serial device I could setup.

Something I think would be interesting to impliment would be WiFi.  It would be less proprietary and more cross capable than the XBee radio.

Form Factor

Funily enough, the form factor of the DUE might be helpful compared to the Teensy++, even though the Teensy is a smaller component.  The problem I was having with my board layout is that I had to fit two Teensy's on the board, and that put a large density of through hole via into the middle of the board.  These via took up a good deal of space and made routing traced around them quite difficult.  The DUE will put all the signal pins on the periphery, and may make packaging easier.  Time and trying it out will tell.

Audio

This was deifinetely something I wasn't expecting.  The DUE supports playback of .WAV files.  I may be able to integrate a 'simple jukebox' that is easyily controlled from the DUE and the HUD since I won't have to interact with an external device.  I've considered devices like the MP3 Trigger from Sparkfun for this role, but that particular device is quite large.  With the internal audio library, I'll just need the footprint of a microSD card.  Testing will tell what the processor usage is for this particular feature.

Built in Scheduler

Also a nice feature I wasn't expecting.  Arduino has put in provisions for running multiple LOOP functions, allowing for a level of protothreading from what I understand of how the code works.  I probably won't be using this option over the threading library I discovered recently, as that one has the ability to add and remove threads during run time, which the Arduino library doesn't seem to support.  That is a particularly useful feature for adding/removing animations based on user input.

Overall, should be a fun piece of kit to use and more suited to what I'm trying to accomplish.

Saturday, December 8, 2012

My Shapeways Shop: Three Name Design

So I'm finally opening up my Shapeways shop with the cufflinks I made from the Guy Manuel and Thomas helmet models that I've generated.

Cufflinks close-up

I plan to create more in the future, but for now, the cufflinks are great opener for the shop.

Please feel free to head on over to the shop and buy some!  I've made 4 versions of the cufflinks, a Thomas/ Guy Man, and left/right handed version of each.  That way you can mix and match and get the style/hand/material of your choice.  I'm a glutton for selection and I'm sure plenty of people are.  The defaults are of the logical choices of course, gold for Guy Man, and silver for Thomas.

Enjoy!

Sunday, December 2, 2012

And Now for Something Completely Different: Halloween Edition

More brownie points for the person that get's that quote in the title.

It's been over a year since the last post?  Well bugger.

What's the reason?  Work.  A job that seemed all consuming and left me with little time or energy for anything but the basics of eat, sleep, clean, exercise, and work.  A job that I have since been release from.  "It is what it is" is the phase I've chosen when describing the ending of that vocation.  What does this mean for me, my projects, and the slow trickle of people who follow my blog?  Not really sure yet, I only got let go about 2 weeks ago.  I'm still trying to figure out what I do now that my former job no longer controls the lions share of my life.

So moving on.  This post is about something I threatened from the beginning, but never pulled the trigger on: topics and projects other than my helmet build.  Luckily, Halloween turned out to be a good vehicle for something completely different to work on.  Yes, I know Halloween was the better part of a month ago.  Please give me a break, I only got my free time back 2 weeks ago and well, I hadn't taken a vacation in a year.  I forgot what lazying around the house felt like!

So during Halloween week I was invited to 2 Halloween parties.  Halloween truly is the Makers and Hackers holiday, and I'm sure the subculture existed and thrived on the holiday far before the modern trend surrounding Make Magazine, Arduino, Makerbot, Instructables, and the like.  For each party I wanted to do something with electronics (naturally) and LEDs (naturally) since everything is better when it glows in the dark (and makes everything else in the dark glow as well).  These projects ended up being the "2 Hour" and the "3 Hour" Halloween costume projects mostly due to poor planning on my part.

2 Hour Halloween Costume: RGB Hands

This was definitely and exercise in "ok, what can I throw together before the party in... oh crap."  Yep, that's almost exactly the words of my internal monologue 2 hours before I had to hit the road.

Such a mess of wires

In the end, I threw together an Arduino (a old pre-Uno 328 I had laying around), a pair of Shiftbrites I had laying around from testing for the DPHP, a USB 5V cell phone extender battery, probably 8ft of ribbon cable, and some finicky direct soldering.  Definitely one of my janky-er builds.  And the arduino was WAY underused.  The LEDs both cycled the same color, and it was just a rainbow hue cycle effect.  Pretty boring.  Definitely ran out of time to do any real or even interesting coding on this one.

So I lost the gloves

The only remotely spiffy thing about it was I put the LEDs in my palms, under some cut up gloves also left over from DPHP prototyping.  It made for a kind of fun way to illuminate my beer bottle and that's about it.  One other trick was sticking the LED through my shirt cuff button hole, resulting in a kinda interesting cufflink.

Really quick wiring

If nothing else it as a decent flashlight, that was one dark party!

3 Hour Halloween Cosutme: Tony Stark

I decided to honor the alma mater and go as Stark for the second party

Yah, I'm sure you believe that line. Stark is the ultimate fictional playboy and what all us intelligent, nerdy engineer people wish it was like for us in the real world.  Basically, this involves making your own arc reactor.

Frontside of arc reactor

Once again, I pulled together some old prototyping parts for this job.  I have some LilyPads arduino boards, which happen to be round, and some leftover rectangular white LEDs from the cheek EQs on the helmet.

All lit up

My first idea was to really quickly solder the LEDs to the Lily with both the cathode and anode going to a pad each, but this wouldn't work because the lilypad is 22 pads (not including power) and so would give you an odd number of LEDs on the board (not very balanced looking).  So instead I went with 10 LEDs and putting a 'ground ring' of wire jumpers for the final design.  The 'housing' was a clear plastic contain lid of the right size, and the LEDs were super glued to the plastic.  The Lilypad 'hovers' hanging from the positive leg of all 10 LEDs.  Some long wires and a 2 AA battery pack later, and you have a really quick and dirty arc reactor.

Backside of arc reactor

Code was pretty simple.  I put in a 'start up' series of flashes when the thing was turned on.  I also put in some really simple animations with a 'fill in, drain out' and 'alternating flash' effects.  Then I put all the animations on a radomizer timer so that 'most' of the time the thing was on just on, but occasionally it would 'act up'.

The costume for this ended up being incredible simple: black jeans and lightweight black 'breathing base layer' T shirt from REI I've had for ages.  I'm already bearded so I didn't have to to anything there, although I am blond so not exactly Tony there.  I wasn't going to dye the beard, I've heard some horror stories on that one.

'Attaching' the reactor to me was less than comfortable.  To stop the soldered LED legs and board components from poking into my chest, I put a backing sheet of plastic taken from a button/pin kit.  That was held in place with double stick foam tape.  I had planned to use some magnets, tape, and few other ideas to hold the reactor to my shirt.  But, my shirt was way too stretchy and there was no good way to support the weight without it shifting or handing at a funny angle.  So I went with the 'worst case' backup in the form of super glue.  I really, really don't recommend that option.  My inebriation made the removal more acceptable, but it wasn't pleasant.  Just don't do it, kids.

So there you have it.  Two LED based Halloween projects that took less than 5 hours start to finish.